
The Cricut machine is one of the most reliable and versatile crafting tools on the market. Its high performance makes it perfect for crafting, which eventually makes it the first choice for all hobby crafters and cutting professionals. However, just like any other machinery, the Cricut machine also requires maintenance to maintain its performance. When it comes to maintaining the machine, changing the blade is often the best starting point for anyone. We understand that this task can be a bit complicated for most. In this guide, we will empower you with knowledge on “how to change blade in Cricut machines“. So, without further delay, let’s get started!
How to Change a Blade in Cricut Machine?
Here are the steps to change a blade in your Cricut Explore, Maker, and Venture machine.
Step 1: Turn Off Your Cricut Machine
Before you start changing the machine blades, it’s important to turn off the machine and unplug it from the power source. This is important because working on the powered-on machine can be fatal and cause serious injuries.
Step 2: Remove the Blade Housing
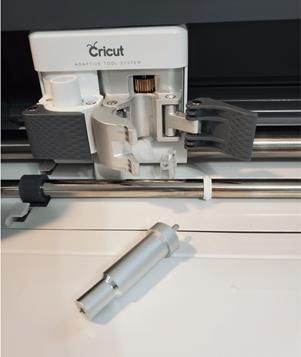
In this step, we’ll start removing the blade housing. To do so, first, locate the blade housing:
- Open clamp B and remove the blade housing.
- For fine-point blades, push the plunger down from the top of the housing. (This will release your blade, so carefully pull it out from the bottom of the housing.)
Step 3: Inserting the New Blade Into Housing

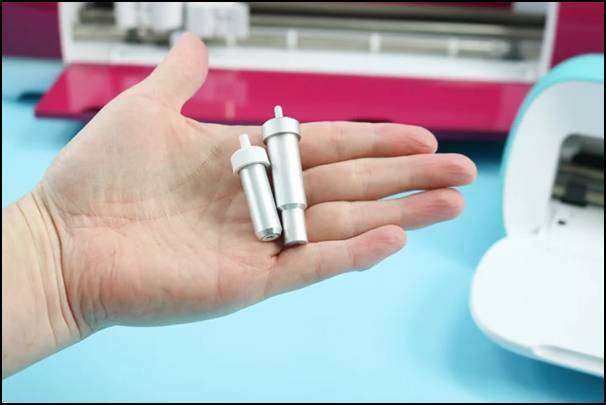
- Next, take the new blade and remove its protective covering.
- Then, insert the new blade in the open housing and make sure the sharp side of the blade points down (outside the blade housing).
Step 4: Assemble the Blade Housing
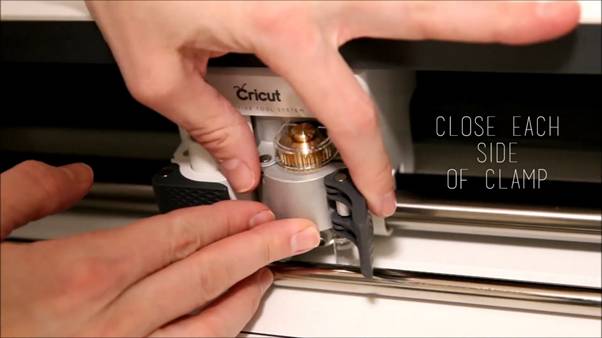
- Once you place the blade correctly, the magnet will hold it in that position.
- Now, position the blade housing in clamp B and close the machine.
How to Change Blade in Cricut Joy Machine
In order to change a blade in your Cricut Joy machine, follow the steps in the section below:
Step 1: Turn off the machine and remove the plug from the power supply.
Step 2: Next, open the clamp from the mechanism and remove the blade housing.
Step 3: Gently push the plunger from the top of the housing and carefully take out the blade from the bottom.
Step 4: Take your new blade and remove it from the covering.
Step 5: After that, insert the new blade into the blade housing. (Make sure you place the blade correctly, with the sharp side pointing out of the housing.)
Step 6: Once you have performed it correctly, the magnet will automatically hold the blade in position.
Step 7: Lastly, put everything back in place and put the clamp in its place.
Benefits of Changing a Blade in Cricut Machine
If you are wondering what difference it will make by changing the blade in the crafting machine. Then, this section will surely answer all your worries because, in this section, we’ll explore the benefits of changing the blade in a Cricut machine, starting with
Cleaner, More Precise Cuts
A new blade will give you more precise cuts and deeper cuts to thicker materials. This will improve your machine’s accuracy to a greater extent, ensuring even more optimal performance.
Reduced Material Waste
With new blades, your cutting machine will achieve more accurate cuts, which helps reduce the chances of tearing or damaging the materials. This ultimately reduces wastage and saves material costs.
Improved Cutting Speed
A fresh blade relies more on sharpness than on pressure when cutting materials. This advantage of the newer blade will lead to faster cutting speed.
Better Handling
When it comes to cutting thin materials like vellum or very fine details, a newer blade will ensure more precise and cleaner cuts without damaging the material.
Conclusion
If you are planning to maintain your Cricut machine, starting with blade replacement is a great idea. This not only improves the machine’s performance but also helps you achieve a smoother experience with enhanced cutting speed and reduced wastage. Follow our guided steps, in which we discuss how to change blade in Cricut machines (Explore, Maker, Venture, as well as Joy). We hope you find this guide informative and useful for changing your machine blades. But if you encounter any difficulty or complications, feel free to contact us. We are the experts who are dedicated to optimizing your Cricut machine-cutting experience.
Frequently Asked Question (FAQs)
How Do I Clean and Maintain My Cricut Mat?
To maintain your mat, first remove any surface debris with a flat instrument such as a scraper or ruler edge. Next, you can use a sticky lint roller to remove dust and debris while rolling in the direction of the paper grain. Wipe off the mat with an alcohol-free baby wipe or damp wipe in small circles until clean, then allow to air dry. For really unclean mats, use warm, soapy water and a gentle sponge, avoiding the scouring side. Finally, to increase the longevity of your mats, store them flat and choose the appropriate mat for your material. By following these procedures, you can keep your mat sticky and ready for precise cuts every time.
Why Cricut App Showing Issue in Downloading?
The process to download the app on all compatible devices is hassle-free. But you may encounter some problems during the process due to many reasons. Here are a few major ones.
- The smartphone or PC does not have enough storage space.
- Your device is not getting a fast internet connection.
- The system OS does not follow the eligibility requirement.
- Maybe your device is facing any software conflict or security product interruptions.
- The settings on your device are incorrect, and more.
If you are having a problem with the Cricut Design Space app download, then look for any issue on your device and try to resolve it.
Why Is My Cricut Explore Air 2 Not Connecting to Bluetooth?
The following could be the top reasons your machine is not connecting to a Bluetooth device.
- The device is not compatible with your machine.
- You are not following the correct connection process.
- There are some issues with the software or machine hardware.
- Using the firewall on your device and others.
You should look for these points in your device and then take the right steps to fix the issue.